Restrict PHP Information Leakage
To restrict PHP information leakage disable expose_php. Edit /etc/php.d/secutity.ini and set the following directive:expose_php=OffWhen enabled, expose_php reports to the world that PHP is installed on the server, which includes the PHP version within the HTTP header (e.g., X-Powered-By: PHP/5.3.3). The PHP logo guids (see example) are also exposed, thus appending them to the URL of a PHP enabled site will display the appropriate logo. When expose_php enabled you can see php version using the following command:
$ curl -I http://www.cyberciti.biz/index.phpSample outputs:
HTTP/1.1 200 OK
X-Powered-By: PHP/5.3.3
Content-type: text/html; charset=UTF-8
Vary: Accept-Encoding, Cookie
X-Vary-Options: Accept-Encoding;list-contains=gzip,Cookie;string-contains=wikiToken;string-contains=
wikiLoggedOut;string-contains=wiki_session
Last-Modified: Thu, 03 Nov 2011 22:32:55 GMT
...
I also recommend that you setup the ServerTokens and ServerSignature directives in httpd.conf to hide Apache version and other information.
#4: Minimize Loadable PHP Modules (Dynamic Extensions)
PHP supports "Dynamic Extensions". By default, RHEL loads all the extension modules found in /etc/php.d/ directory. To enable or disable a particular module, just find the configuration file in /etc/php.d/ directory and comment the module name. You can also rename or delete module configuration file. For best PHP performance and security, you should only enable the extensions your webapps requires. For example, to disable gd extension, type the following commands:# cd /etc/php.d/
# mv gd.{ini,disable}
# /sbin/service httpd restartTo enable php module called gd, enter:
# mv gd.{disable,ini}
 # /sbin/service httpd restart
#5: Log All PHP Errors
Do not expose PHP error messages to all site visitors. Edit /etc/php.d/security.ini and set the following directive:display_errors=OffMake sure you log all php errors to a log file:
log_errors=On
error_log=/var/log/httpd/php_scripts_error.log
#6: Disallow Uploading Files
Edit /etc/php.d/security.ini and set the following directive to disable file uploads for security reasons:file_uploads=OffIf users of your application need to upload files, turn this feature on by setting upload_max_filesize limits the maximum size of files that PHP will accept through uploads:
file_uploads=On
# user can only upload upto 1MB via php
upload_max_filesize=1M
#7: Turn Off Remote Code Execution
If enabled, allow_url_fopen allows PHP's file functions -- such as file_get_contents() and the include and require statements -- can retrieve data from remote locations, like an FTP or web site.The allow_url_fopen option allows PHP's file functions - such as file_get_contents() and the include and require statements - can retrieve data from remote locations using ftp or http protocols. Programmers frequently forget this and don't do proper input filtering when passing user-provided data to these functions, opening them up to code injection vulnerabilities. A large number of code injection vulnerabilities reported in PHP-based web applications are caused by the combination of enabling allow_url_fopen and bad input filtering. Edit /etc/php.d/security.ini and set the following directive:
allow_url_fopen=OffI also recommend to disable allow_url_include for security reasons:
allow_url_include=Off
#8: Enable SQL Safe Mode
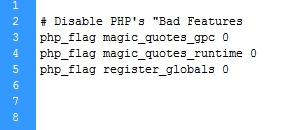
Edit /etc/php.d/security.ini and set the following directive:sql.safe_mode=OnIf turned On, mysql_connect() and mysql_pconnect() ignore any arguments passed to them. Please note that you may have to make some changes to your code. Third party and open source application such as WordPress, and others may not work at all when sql.safe_mode enabled. I also recommend that you turn off magic_quotes_gpc for all php 5.3.x installations as the filtering by it is ineffective and not very robust. mysql_escape_string() and custom filtering functions serve a better purpose (hat tip to Eric Hansen):
magic_quotes_gpc=Off
#9: Control POST Size
The HTTP POST request method is used when the client (browser or user) needs to send data to the Apache web server as part of the request, such as when uploading a file or submitting a completed form. Attackers may attempt to send oversized POST requests to eat your system resources. You can limit the maximum size POST request that PHP will process. Edit /etc/php.d/security.ini and set the following directive:; Set a realistic value here post_max_size=1KThe 1K sets max size of post data allowed by php apps. This setting also affects file upload. To upload large files, this value must be larger than upload_max_filesize. I also suggest that you limit available methods using Apache web server. Edit, httpd.conf and set the following directive for DocumentRoot /var/www/html:
<Directory /var/www/html>
    <LimitExcept GET POST>
        Order allow,deny
    </LimitExcept>
## Add rest of the config goes here... ##
</Directory>
#10: Resource Control (DoS Control)
You can set maximum execution time of each php script, in seconds. Another recommend option is to set maximum amount of time each script may spend parsing request data, and maximum amount of memory a script may consume. Edit /etc/php.d/security.ini and set the following directives:# set in seconds max_execution_time = 30 max_input_time = 30 memory_limit = 40M
#11: Install Suhosin Advanced Protection System for PHP
From the project page:Suhosin is an advanced protection system for PHP installations. It was designed to protect servers and users from known and unknown flaws in PHP applications and the PHP core. Suhosin comes in two independent parts, that can be used separately or in combination. The first part is a small patch against the PHP core, that implements a few low-level protections against bufferoverflows or format string vulnerabilities and the second part is a powerful PHP extension that implements all the other protections.See how to install and configure suhosin under Linux operating systems.
#12 Disabling Dangerous PHP Functions
PHP has a lot of functions which can be used to crack your server if not used properly. You can set list of functions in /etc/php.d/security.ini using disable_functions directive:disable_functions =exec,passthru,shell_exec,system,proc_open,popen,curl_exec,curl_multi_exec
,parse_ini_file,show_source
#13 PHP Fastcgi / CGI - cgi.force_redirect Directive
PHP work with FastCGI. Fascgi reduces the memory footprint of your web server, but still gives you the speed and power of the entire PHP language. You can configure Apache2+PHP+FastCGI or cgi as described here. The configuration directive cgi.force_redirect prevents anyone from calling PHP directly with a URL like http://www.cyberciti.biz/cgi-bin/php/hackerdir/backdoor.php. Turn on cgi.force_redirect for security reasons. Edit /etc/php.d/security.ini and set the following directive:; Enable cgi.force_redirect for security reasons in a typical *Apache+PHP-CGI/FastCGI* setup cgi.force_redirect=On
#14 PHP User and Group ID
mod_fastcgi is a cgi-module for Apache web server. It can connect to an external FASTCGI server. You need to make sure php run as non-root user. If PHP executes as a root or UID under 100, it may access and/or manipulate system files. You must execute PHP CGIs as a non-privileged user using Apache's suEXEC or mod_suPHP. The suEXEC feature provides Apache users the ability to run CGI programs under user IDs different from the user ID of the calling web server. In this example, my php-cgi is running as phpcgi user and apache is running as apache user:# ps aux | grep php-cgiSample outputs:
phpcgi      6012  0.0  0.4 225036 60140 ?        S    Nov22   0:12 /usr/bin/php-cgi
phpcgi      6054  0.0  0.5 229928 62820 ?        S    Nov22   0:11 /usr/bin/php-cgi
phpcgi      6055  0.1  0.4 224944 53260 ?        S    Nov22   0:18 /usr/bin/php-cgi
phpcgi      6085  0.0  0.4 224680 56948 ?        S    Nov22   0:11 /usr/bin/php-cgi
phpcgi      6103  0.0  0.4 224564 57956 ?        S    Nov22   0:11 /usr/bin/php-cgi
phpcgi      6815  0.4  0.5 228556 61220 ?        S    00:52   0:19 /usr/bin/php-cgi
phpcgi      6821  0.3  0.5 228008 61252 ?        S    00:55   0:12 /usr/bin/php-cgi
phpcgi      6823  0.3  0.4 225536 58536 ?        S    00:57   0:13 /usr/bin/php-cgi
You can use tool such as spawn-fcgi to spawn remote and local FastCGI processes as phpcgi user (first, add phpcgi user to the system):
# spawn-fcgi -a 127.0.0.1 -p 9000 -u phpcgi -g phpcgi -f /usr/bin/php-cgiNow, you can configure Apache, Lighttpd, and Nginx web server to use external php FastCGI running on port 9000 at 127.0.0.1 IP address.
#15 Limit PHP Access To File System
The open_basedir directive set the directories from which PHP is allowed to access files using functions like fopen(), and others. If a file is outside of the paths defined by open_basdir, PHP will refuse to open it. You cannot use a symbolic link as a workaround. For example only allow access to /var/www/html directory and not to /var/www, or /tmp or /etc directories:; Limits the PHP process from accessing files outside ; of specifically designated directories such as /var/www/html/ open_basedir="/var/www/html/" ; ------------------------------------ ; Multiple dirs example ; open_basedir="/home/httpd/vhost/cyberciti.biz/html/:/home/httpd/vhost/nixcraft.com/html/:
/home/httpd/vhost/theos.in/html/"
; ------------------------------------
#16 Session Path
Session support in PHP consists of a way to preserve certain data across subsequent accesses. This enables you to build more customized applications and increase the appeal of your web site. This path is defined in /etc/php.ini file and all data related to a particular session will be stored in a file in the directory specified by the session.save_path option. The default is as follows under RHEL/CentOS/Fedora Linux:session.save_path="/var/lib/php/session" ; Set the temporary directory used for storing files when doing file upload upload_tmp_dir="/var/lib/php/session"Make sure path is outside /var/www/html and not readable or writeable by any other system users:
# ls -Z /var/lib/php/Sample outputs:
drwxrwx---. root apache system_u:object_r:httpd_var_run_t:s0 sessionNote: The -Z option to the ls command display SELinux security context such as file mode, user, group, security context and file name.
#17 Keep PHP, Software, And OS Up to Date
Applying security patches is an important part of maintaining Linux, Apache, PHP, and MySQL server. All php security update should be reviewed and applied as soon as possible using any one of the following tool (if you're installing PHP via a package manager):# yum updateOR
# apt-get update && apt-get upgradeYou can configure Red hat / CentOS / Fedora Linux to send yum package update notification via email. Another option is to apply all security updates via a cron job. Under Debian / Ubuntu Linux you can use apticron to send security notifications.
Note: Check php.net for the most recent release for source code installations.
#18: Restrict File and Directory Access
Make sure you run Apache as a non-root user such as Apache or www. All files and directory should be owned by non-root user (or apache user) under /var/www/html:# chown -R apache:apache /var/www/html//var/www/html/ is a subdirectory and DocumentRoot which is modifiable by other users since root never executes any files out of there, and shouldn't be creating files in there.
Make sure file permissions are set to 0444 (read-only) under /var/www/html/:
# chmod -R 0444 /var/www/html/Make sure all directories permissions are set to 0445 under /var/www/html/:
# find /var/www/html/ -type d -print0 | xargs -0 -I {} chmod 0445 {}A Note About Setting Up Correct File Permissions
The chown and chmod command make sures that under no circumstances DocumentRoot or files contained in DocumentRoot are writable by the Web server user apache. Please note that you need to set permissions that makes the most sense for the development model of your website, so feel free to adjust the chown and chmod command as per your requirements. In this example, the Apache server run as apache user. This is configured with the User and Group directives in your httpd.conf file. The apache user needs to have read access to everything under DocumentRoot but should not have write access to anything.Make sure httpd.conf has the following directives for restrictive configuration:
<Directory / >
    Options None
    AllowOverride None
    Order allow,deny
</Directory>
You should only grant write access when required. Some web
applications such as wordpress and others may need a caching directory.
You can grant a write access to caching directory using the following
commands:# chmod a+w /var/www/html/blog/wp-content/cache
### block access to all ###
# echo 'deny from all' > /var/www/html/blog/wp-content/cache/.htaccess#19: Write Protect Apache, PHP, and, MySQL Configuration Files
Use the chattr command to write protect configuration files:# chattr +i /etc/php.ini
# chattr +i /etc/php.d/*
# chattr +i /etc/my.ini
# chattr +i /etc/httpd/conf/httpd.conf
# chattr +i /etc/The chattr command can write protect your php file or files in /var/www/html directory too:
# chattr +i /var/www/html/file1.php
 # chattr +i /var/www/html/
#20: Use Linux Security Extensions (such as SELinux)
Linux comes with various security patches which can be used to guard against misconfigured or compromised server programs. If possible use SELinux and other Linux security extensions to enforce limitations on network and other programs. For example, SELinux provides a variety of security policies for Linux kernel and Apache web server. To list all Apache SELinux protection variables, enter:# getsebool -a | grep httpdSample outputs:
allow_httpd_anon_write --> off
allow_httpd_mod_auth_ntlm_winbind --> off
allow_httpd_mod_auth_pam --> off
allow_httpd_sys_script_anon_write --> off
httpd_builtin_scripting --> on
httpd_can_check_spam --> off
httpd_can_network_connect --> off
httpd_can_network_connect_cobbler --> off
httpd_can_network_connect_db --> off
httpd_can_network_memcache --> off
httpd_can_network_relay --> off
httpd_can_sendmail --> off
httpd_dbus_avahi --> on
httpd_enable_cgi --> on
httpd_enable_ftp_server --> off
httpd_enable_homedirs --> off
httpd_execmem --> off
httpd_read_user_content --> off
httpd_setrlimit --> off
httpd_ssi_exec --> off
httpd_tmp_exec --> off
httpd_tty_comm --> on
httpd_unified --> on
httpd_use_cifs --> off
httpd_use_gpg --> off
httpd_use_nfs --> off
To disable Apache cgi support, enter:
# setsebool -P httpd_enable_cgi offSee Red Hat SELinux guide for more information.
#21 Install Mod_security
ModSecurity is an open source intrusion detection and prevention engine for web applications. You can easily install mod_security under Linux and protect apache and php based apps from xss and various other attacks:## A few Examples ## # Do not allow to open files in /etc/ SecFilter /etc/ # Stop SQL injection SecFilter "delete[[:space:]]+from" SecFilter "select.+from"
#22 Run Apache / PHP In a Chroot Jail If Possible
Putting PHP and/or Apache in a chroot jail minimizes the damage done by a potential break-in by isolating the web server to a small section of the filesystem. You can use traditional chroot kind of setup with Apache. However, I recommend FreeBSD jails, XEN virtulization, KVM virtulization, or OpenVZ virtualization which uses the concept of containers.#23 Use Firewall To Restrict Outgoing Connections
The attacker will download file locally on your web-server using tools such as wget. Use iptables to block outgoing connections from apache user. The ipt_owner module attempts to match various characteristics of the packet creator, for locally generated packets. It is only valid in the OUTPUT chain. In this example, allow vivek user to connect outside using port 80 (useful for RHN or centos repo access):
/sbin/iptables -A OUTPUT -o eth0 -m owner --uid-owner vivek -p tcp --dport 80 -m state --state
NEW,ESTABLISHED -j ACCEPTHere is another example that blocks all outgoing connections from apache user except to our own smtp server, and spam validation API service:
# ....
/sbin/iptables --new-chain apache_user
/sbin/iptables --append OUTPUT -m state --state ESTABLISHED,RELATED -j ACCEPT
/sbin/iptables --append OUTPUT -m owner --uid-owner apache -j apache_user
# allow apache user to connec to our smtp server
/sbin/iptables --append apache_user -p tcp --syn -d 192.168.1.100 --dport 25 -j RETURN
# Allow apache user to connec to api server for spam validation
/sbin/iptables --append apache_user -p tcp --syn -d  66.135.58.62 --dport 80 -j RETURN
/sbin/iptables --append apache_user -p tcp --syn -d  66.135.58.61 --dport 80 -j RETURN
/sbin/iptables --append apache_user -p tcp --syn -d  72.233.69.89 --dport 80 -j RETURN
/sbin/iptables --append apache_user -p tcp --syn -d  72.233.69.88 --dport 80 -j RETURN
#########################
## Add more rules here ##
#########################
# No editing below
# Drop everything for apache outgoing connection
/sbin/iptables --append apache_user -j REJECT
#24 Watch Your Logs & Auditing
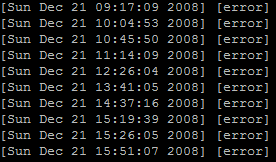
Check the apache log file:# tail -f /var/log/httpd/error_log
# grep 'login.php' /var/log/httpd/error_log
# egrep -i "denied|error|warn" /var/log/httpd/error_log Check the php log file:
# tail -f /var/log/httpd/php_scripts_error.log
 # grep "...etc/passwd" /var/log/httpd/php_scripts_error.log
Log files will give you some understanding of what attacks is thrown against the server and allow you to check if the necessary level of security is present or not. The auditd service is provided for system auditing. Turn it on to audit SELinux events, authetication events, file modifications, account modification and so on. I also recommend using standard "Linux System Monitoring Tools" for monitoring your web-server.
#25 Run Service Per System or VM Instance
For large installations it is recommended that you run, database, static, and dynamic content from different servers.///////////////
/ ISP/Router /
//////////////
\
|
Firewall
\
|
+------------+
| LB01 |
+------------+ +--------------------------+
| | static.lan.cyberciti.biz |
+-----------------+--------------------------+
| phpcgi1.lan.cyberciti.biz|
+--------------------------+
| phpcgi2.lan.cyberciti.biz|
+--------------------------+
| mysql1.lan.cyberciti.biz |
+--------------------------+
| mcache1.lan.cyberciti.biz|
+--------------------------+
(Fig.01: Running Services On Separate Servers)Run different network services on separate servers or VM instances. This limits the number of other services that can be compromised. For example, if an attacker able to successfully exploit a software such as Apache flow, he / she will get an access to entire server including other services running on the same server (such as MySQL, e-mail server and so on). But, in the above example content are served as follows:
- static.lan.cyberciti.biz - Use lighttpd or nginx server for static assets such as js/css/images.
- phpcgi1.lan.cyberciti.biz and phpcgi2.lan.cyberciti.biz - Apache web-server with php used for generating dynamic content.
- mysql1.lan.cyberciti.biz - MySQL database server.
- mcache1.lan.cyberciti.biz - Memcached server is very fast caching system for MySQL. It uses libevent or epoll (Linux runtime) to scale to any number of open connections and uses non-blocking network I/O.
- LB01 - A nginx web and reverse proxy server in front of Apache Web servers. All connections coming from the Internet addressed to one of the Web servers are routed through the nginx proxy server, which may either deal with the request itself or pass the request wholly or partially to the main web servers. LB01 provides simple load-balancing.
#26 Additional Tools
From the project page:PHPIDS (PHP-Intrusion Detection System) is a simple to use, well structured, fast and state-of-the-art security layer for your PHP based web application. The IDS neither strips, sanitizes nor filters any malicious input, it simply recognizes when an attacker tries to break your site and reacts in exactly the way you want it to.You can use PHPIDS to detect malicious users, and log any attacks detected for later review. Please note that I've personally not used this tool.
From the project page:
PhpSecInfo provides an equivalent to the phpinfo() function that reports security information about the PHP environment, and offers suggestions for improvement. It is not a replacement for secure development techniques, and does not do any kind of code or app auditing, but can be a useful tool in a multilayered security approach.See Linux security hardening tips which can reduce available vectors of attack on the system.
A Note About PHP Backdoors
You may come across php scripts or so called common backdoors such as c99, c99madshell, r57 and so on. A backdoor php script is nothing but a hidden script for bypassing all authentication and access your server on demand. It is installed by an attackers to access your server while attempting to remain undetected. Typically a PHP (or any other CGI script) script by mistake allows inclusion of code exploiting vulnerabilities in the web browser. An attacker can use such exploiting vulnerabilities to upload backdoor shells which can give him or her a number of capabilities such as:- Download files
- Upload files
- Install rootkits
- Set a spam mail servers / relay server
- Set a proxy server to hide tracks
- Take control of server
- Take control of database server
- Steal all information
- Delete all information and database
- Open TCP / UDP ports and much more
Tip: How Do I Search PHP Backdoors?
Use Unix / Linux grep command to search c99 or r57 shell:# grep -iR 'c99' /var/www/html/
# grep -iR 'r57' /var/www/html/
# find /var/www/html/ -name \*.php -type f -print0 | xargs -0 grep c99
# grep -RPn "(passthru|shell_exec|system|base64_decode|fopen|fclose|eval)" /var/www/html/Conclusion
Your PHP based server is now properly harden and ready to show dynamic webpages. However, vulnerabilities are caused mostly by not following best practice programming rules. You should be consulted further resources for your web applications security needs especially php programming which is beyond the scope of sys admin work.References:
- PHP security - from the official php project.
- PHP security guide - from the PHP security consortium project.
- Apache suseexec - documentation from the Apache project.
- Apache 2.2 - security tips from the Apache project.
- The Open Web Application Security Project - Common types of application security attacks.
Recommended readings:
- PHP Security Guide: This guide aims to familiarise you with some of the basic concepts of online security and teach you how to write more secure PHP scripts. It's aimed squarely at beginners, but I hope that it still has something to offer more advanced users.
- Essential PHP Security (kindle edition): A book about web application security written specifically for PHP developers. It covers 30 of the most common and dangerous exploits as well as simple and effective safeguards that protect your PHP applications.
- SQL Injection Attacks and Defense This book covers sql injection and web-related attacks. It explains SQL injection. How to find, confirm, and automate SQL injection discovery. It has tips and tricks for finding SQL injection within the code. You can create exploits using SQL injection and design to avoid the dangers of these attacks.